Testing OneSignal Push Notifications on the Simulator
Apple Push Notification Service is an essential feature for many apps. We need to stay in touch with our users to inform them about the status of an action, new progress in their journey, and to remind them of important activities when our app is not in the foreground. We intensively use Apple’s push notifications service to meet these purposes and do this via OneSignal for a long time since it is easy to use, reliable, and solves our problems. It provides additional features and performs some work to make your customized notifications meaningful. You only need to setup OneSignal iOS SDK as guided here.
Testing push notifications
When you finish setting up OneSignal, you can add your device as a test device and send a test notification from OneSignal Dashboard. If everything works as expected, it is time to implement a notification handler, do functional tests, and write unit tests.
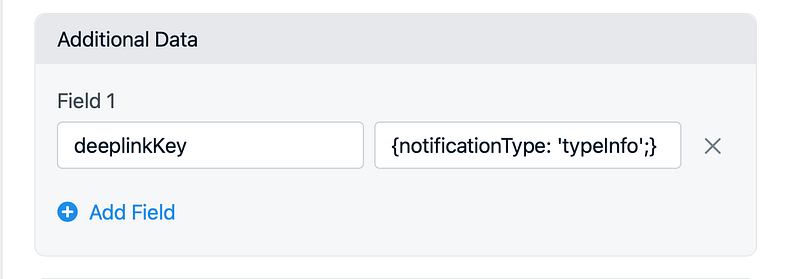
You can add custom data to your push notification so that you can do some work in the app. On the OneSignal dashboard, you do this in “additional data” section. You only need to add a key and value. You can add multiple keys for different purposes. If you declare a JSON string, you can easily unwrap it to an entity.
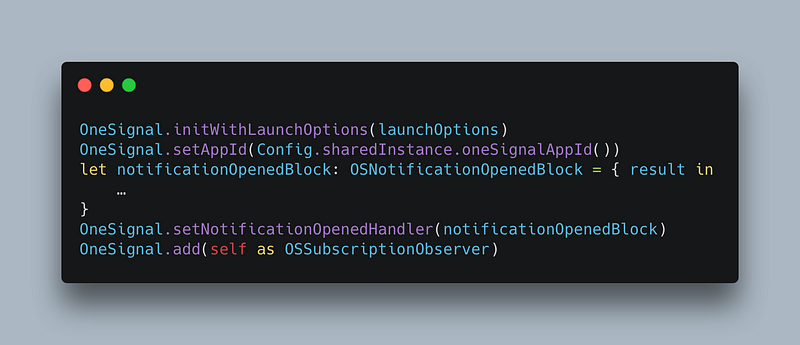
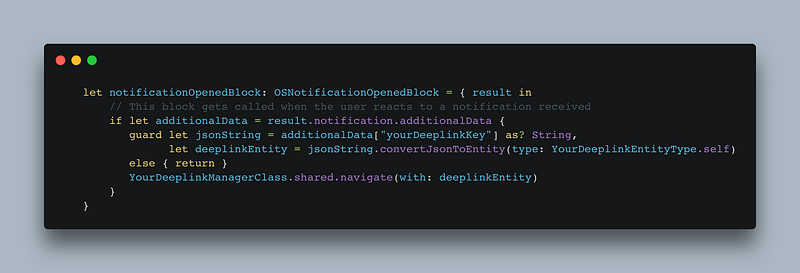
You should add OSNotificationOpenedBlockto handle additional data in AppDelegate. You can add this block to the as same method as you set up OneSignal. resultparameter has the all necessary information.
You will have different types of notifications over time. If you do not implement a scalable mechanism, you will have problems with maintenance. We use the chain of responsibility pattern that Ahmet Keskin presents here. CoR pattern applies strategy pattern as a behavioral pattern. It also applies single responsibility and open-closed principles.
You can do real-time tests or send test notifications from OneSignal Dashboard but you will be overwhelmed if you iterate this more than a couple of times. There are two other solutions; writing unit tests or using a simulator. The best practice is writing tests for your notifications but it does not mean simulator testing is not helpful. Let’s start with using the simulator to test notifications.
Simulator Testing
We first need to create a .apns file with additional data. This is our push notification payload.
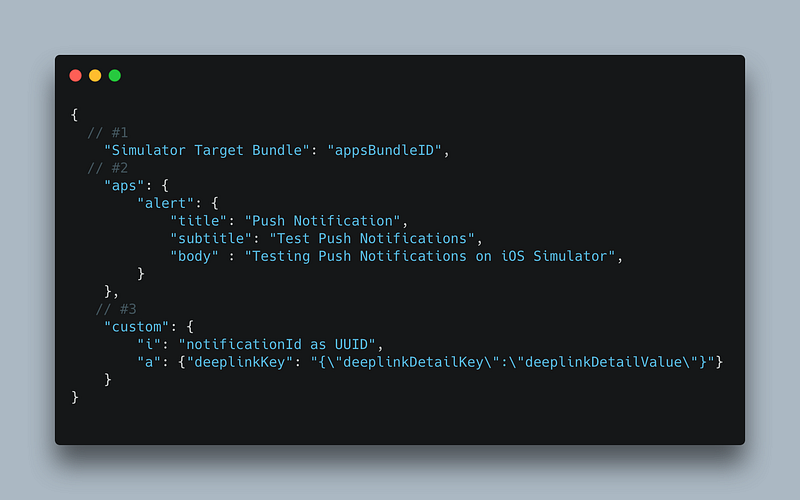
Let’s break down the apns above;
- You should write your apps bundle id here. The simulator matches the notification with your app by looking at this key.
- You should prepare the notification alert, sound, and other preferences under aps. You can find more of these keys here in the official documentation.
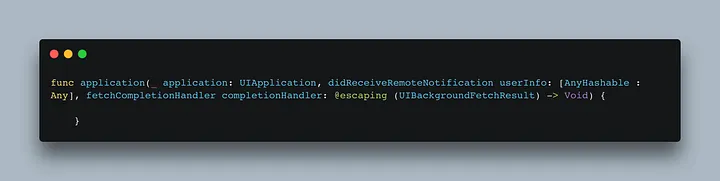
- Declare your custom data here. “i”and “a” keys must-have. “i” stands for notificationId. You can set a UUID for its value. “a” stands for additional data and this is where you define the additional data. These keys are specific to OneSignal. If you were not using OneSignal, you could define any key that you want and unwrap launchOptions?[.remoteNotification] when app starts. You can also use didReceiveRemoteNotification*method to do the same thing while the app is in the foreground.
After you create this file, you should save it as a .apns file such as payload.apns.
Now, you have your push notification payload. You only need to run your app in the simulator and drag & drop the payload over the simulator.

You should set the scheme’s launch option to “Wait for the executable to be launched”to debug your notification payload and mechanism.You can also drag & drop the payload over the simulator while the app is in the foreground. The debugger will stop at the breakpoints.
Unit Testing
Unit testing push notifications is simple. It is enough to set up the push notification mechanism and pass expected data to that. If it returns the expected output and opens the expected view, then everything is fine. You do not need to mock anything. How you receive the payload or what is happening in another class should not be a concern.
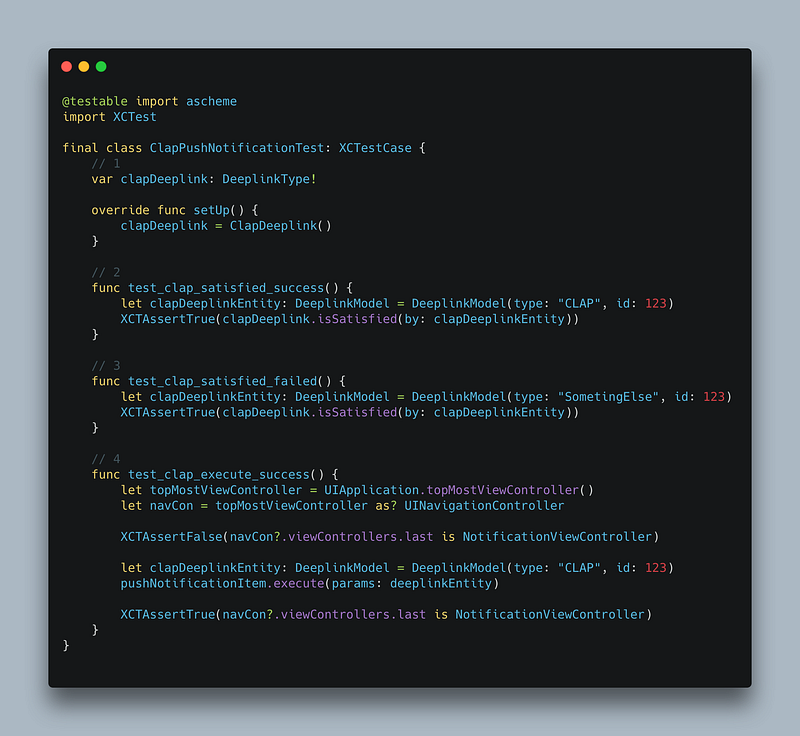
Let’s break down the unit test above;
- You should define the deep link that is under test here. Then you should declare it in setUp(). We test the clap deep link in this example.
- CoR pattern has two methods; isSatisfied and execute. isSatisfied method returns whether a model satisfies a deep link type or not. Here, clapDeeplink is supposed to satisfy clapDeeplinkEntity and the test should pass.
p.s.: We receive additional data as a string but pass a deep link type to the manager. Because we convert the string to an entity with a helper. We can write a test for that helper too but not here. - We should make sure that clapDeeplink does not satisfy everything but clapDeeplinkEntity.
- The last test is for execute method. If number two fails, this should fail too in any case. If clapDeeplinkEntity is satisfied by the clapDeeplink. Then, it can execute the entity. ClapDeeplink opens NotificationViewController. We understand the result of executing the method by looking at the topmost view’s type. If it is NotificationViewController, the test passes.
That’s all. You can apply the CoR pattern or another. Unit testing notifications should be similar to this. Pass the data as same as the payload, ensure that your tests pass. If you want to see that NotificationViewControllerhandles the data as expected, you should write tests to NotificationViewController.
To learn more about our development experiences, you can have look at our medium page. At Plus Minus One, we love to learn and share our experiences. We hope this article makes your life easier 🙏🏻
| [Musa Kökçen - Turkey | Professional Profile | LinkedIn](https://www.linkedin.com/in/musakokcen/) |